There is a highly requested feature on the project managment tool Wrike: the ability to have custom fields duplicated from the original task when they are made recurring. There are multiple threads on the Wrike forums requesting it for years, but it has yet to be implemented.
We use Wrike at Material Retail and recently our team brought it to my attention that it was a real pain that Wrike did not have this feature. I have come up with a solution using Zapier for our team so I thought I would share it here in case anyone else is interested. It does require a third party (Zapier) but it gets the job done for us and helps keep our recurring tasks much more organized.
A few caveats
- It will require a Zapier paid plan, which starts at $29.99/month.
- The original recurring tasks will need to have a unique code in their title that we can use to determine which custom field values to apply. For example, we use the client initials in square brackets, so a task name might look like “[AL] Black Friday Email”.
- You will have to get somewhat familiar with the Wrike APIs in order to find the internal Wrike IDs for the custom fields that you want to apply.
- You need some familiarity with javascript in order to modify the Javascript code run in Zapier.
So — with that said, here is an overview of how to do this:
1. Get Internal Wrike IDs for your custom fields
Before we can setup our Zap (in the next step), we need to find the internal IDs of the custom fields that we want to set on the duplicated tasks.
Doing this, at a high level, involves:
- Create a custom Wrike App and get a permanent access token.
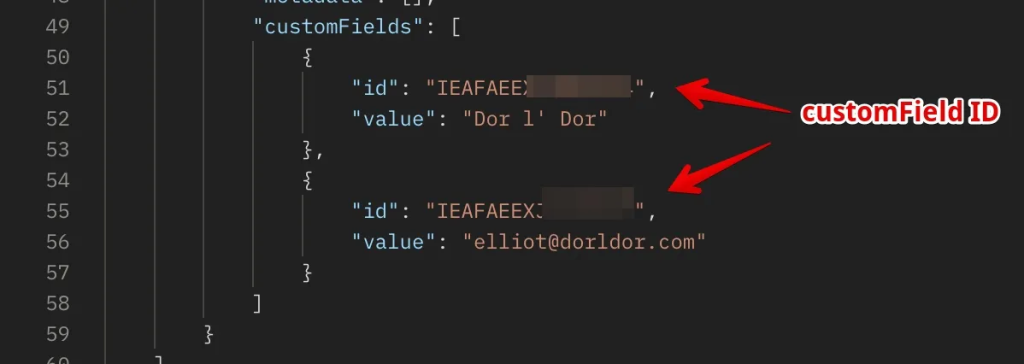
- Use the Wrike APIv4 locally (I suggest using Postman as they have provided Postman Collections on their developer page) to fetch a sample task that has the custom fields you want to apply to the duplicate tasks. You might have to first use the “Get Task by Permalink” method and then take that ID and use the “Get Task by ID” method, until you see the “customFields” object in the response that looks like this:
2. Sign up for Zapier and create a Zap
- Go to Zapier and sign up for a free account. There are a bunch of onboarding screens where they will ask you for information, you can press “skip” on these.
- Create your Zap that will fetch new Wrike tasks, and then based on the title, will apply the custom fields that you want. It has the following three steps:
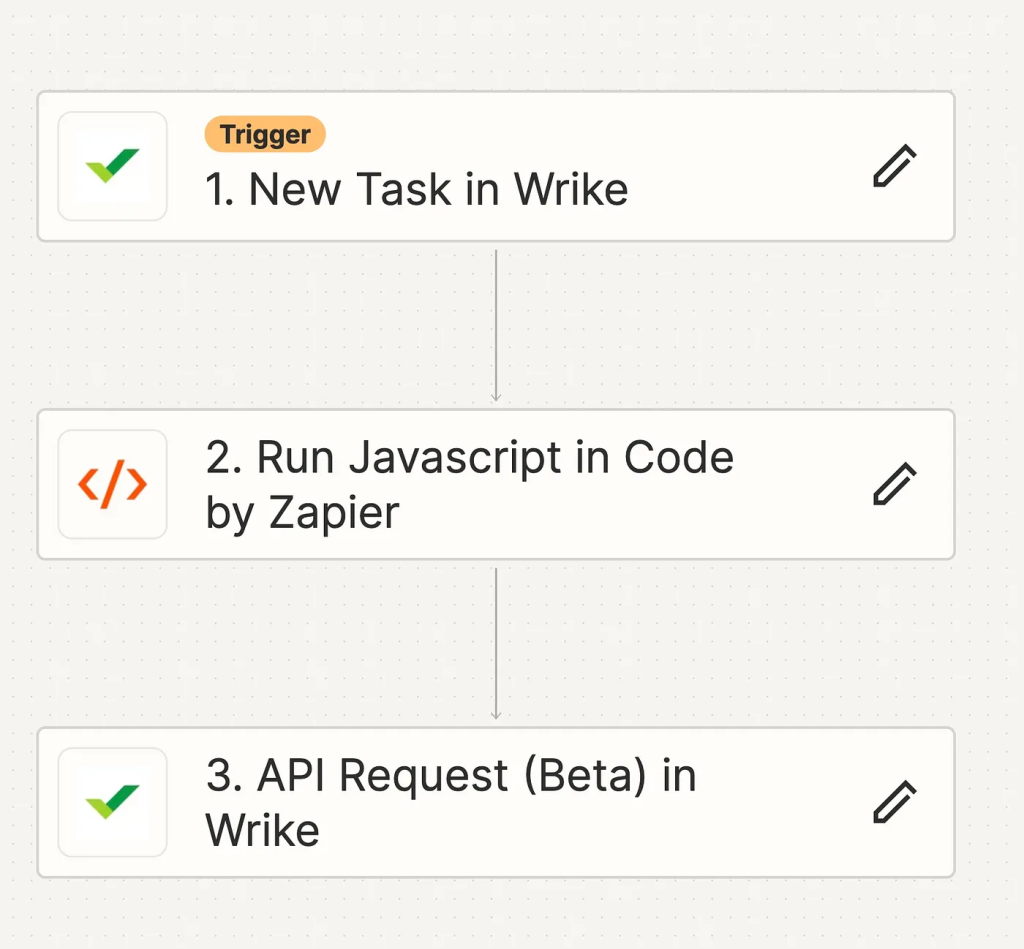
Step 1: New Task in Wrike
App: Wrike, Event: “New Task”
Connect to Wrike and select event “New Task”. You can specify your Wrike account and the folder that you want to target.
Step 2: Run Javascript in Code by Zapier
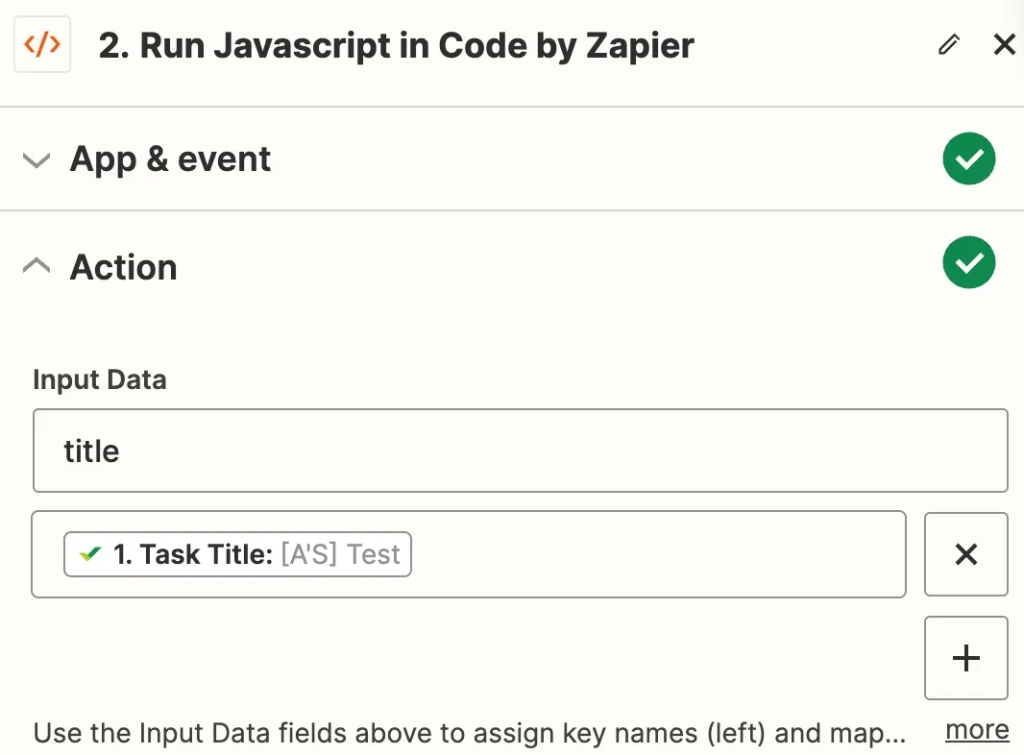
App: Code by Zapier, Event: Run Javascript
- Under “Action” make inputData the task Title:
2. Under “Code” start with the following:
// you will need to customize this clientLookup object to contain
// the keys and data that make sense for your use case:

const clientLookup = {
    "[AP]": { name: "Allied Psych", email: "drguttman@alliedpsych.com" },
    "[AS]": { name: "Alligator Sun", email: "alligatorsun@yahoo.com" }
};

const clientKey = inputData.title.match(/\[.*?\]/)[0];

const clientName = clientLookup[clientKey].name || 'Unknown Client';

const clientEmail = clientLookup[clientKey].email || 'Unknown Email';

return {clientName: clientName, clientEmail: clientEmail}
Basically, this code is going to match on the title of the Wrike task and find the name and email from the clientLookup object and return them to the next step in the Zap. In our case, a task name like “[AS] Summer Collection Email” will match to the “[AS”] key and return the name Alligator Sun and email alligatorsun@yahoo.com.
Step 3: Api Request (Beta) in Wrike
App: Wrike, Event: API Request (Beta)
Connect your Wrike account, as before, and under Action configure it as follows:
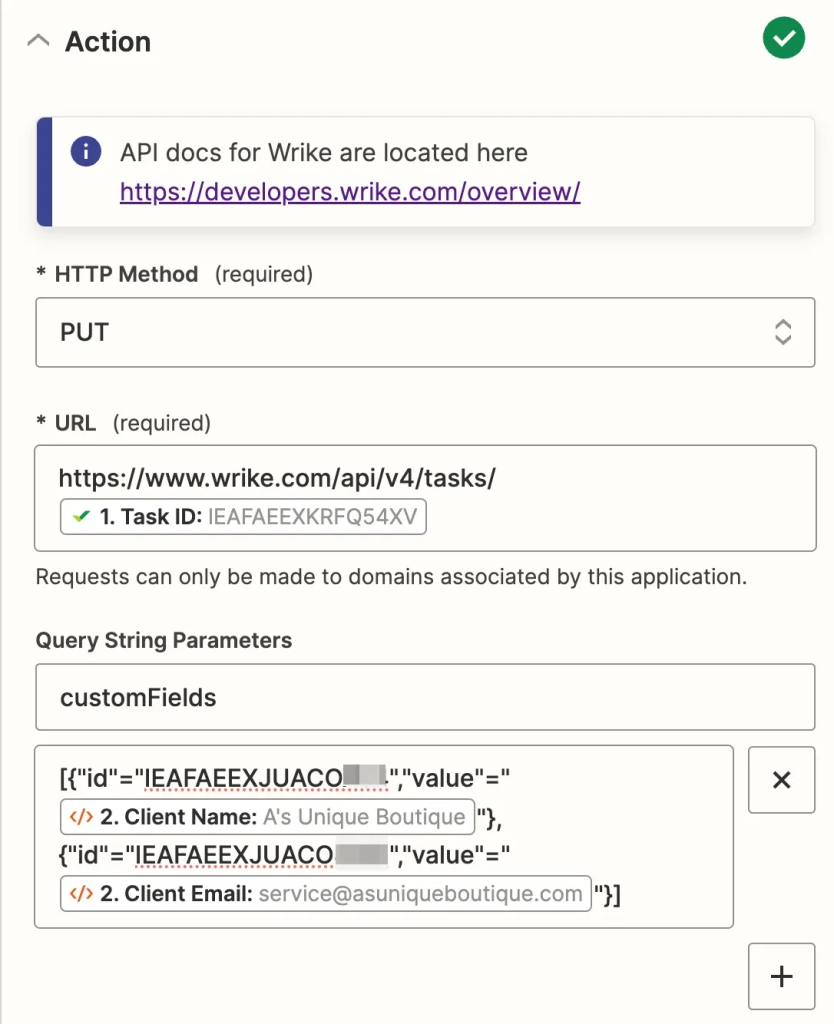
Note that the value of the “customFields” query string parameters is where you need to use the internal Wrike IDs of the custom fields that you obtained earlier.
Where it says “Task ID”, “Client Name” and “Client Email” you need to use the Zapier “Insert Data” function to insert the Task ID from step 1 and Client Name and Client Email returned from the Javascript code run in Step 2.
That’s It!
Now you should have a Zap setup that will fetch new Wrike tasks, and based on the code in the title, will apply certain custom field values. So, when a recurring task is created in Wrike, Zapier will automatically apply the custom field values you specify in the Zap.
Please leave a comment if you end up using this!
Leave a Reply